Brake noise is one of the major reasons for a driver to visit a mechanic. It can be a complex issue and is often difficult to solve.
WHAT IS BRAKE NOISE?
Brake noise typically originates from vibration of a part within the wheel end section of the vehicle – between the tire and the connection to the chassis. Noise is often blamed on the brake pad itself, but can come from any part, from the wheel bearing to the ball joint. Within the brake system, it’s normal to have some vibration, but it is not usually intense enough to be audible.
A. TYPES OF NOISE EXPERIENCED BY DRIVERS
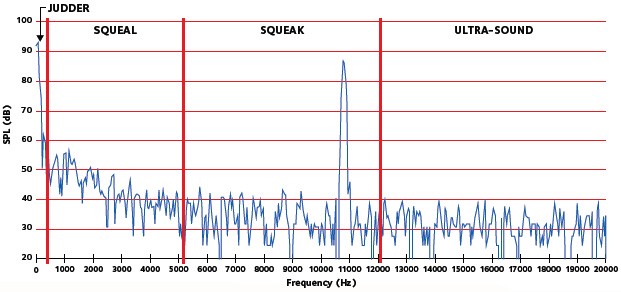
LOW FREQUENCY VIBRATIONS – JUDDER
DESCRIPTION:
A deep noise with frequency below 300hz.
CAUSE
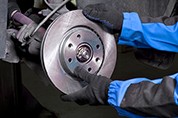
- Poor tolerance (poor fitment on the hub or excessive disc thickness variation)
- Rotor damage
SOLUTION
Replace the rotor and clean and lubricate all surfaces of the brake assembly according to the vehicle manufacturer's instructions.
MEDIUM FREQUENCY VIBRATIONS – SQUEAL
DESCRIPTION
Noise with frequency in the range 300 - 5,000 Hz.
CAUSES
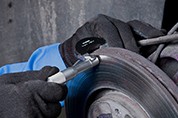
- Sticky movement on the caliper piston
- Rough finish of the working surface of the rotor
- Pad fitting errors
- Hardware and shims are not installed properly
- Disc thickness too low
SOLUTION
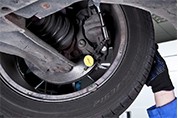
- Clean and lubricate components of the caliper
- Ensure rotor surface finish (once fitted on to the hub) will stay within a tolerance of 0.1 mm
- Clean the hub surface, machine rotor surface
- Replace rotor and make sure brake pads, shims and accessories are fitted properly
- Consider damping noise intensity with shims or brake pads with noise-reduction features
HIGH FREQUENCY VIBRATIONS – SQUEAK
DESCRIPTION
Noise with frequency higher than 5 kHz.
CAUSES
The most common reason for a squeak is a molecular vibration within the friction material during application to the brake rotor.
SOLUTION
Replace the brake pad set. Also check that the accessories (e.g. the caliper clips) are correct and properly fitted.
VERY HIGH FREQUENCY VIBRATIONS – ULTRASOUND
DESCRIPTION
Noise with frequency higher than 12 KHz, greater than the upper limit of human hearing.
B. FRICTION SURFACES GIVE VITAL CLUES
The appearance of the friction surfaces can give a good indication of the causes of noise problems. Jack up the vehicle, remove the pads and examine the friction surfaces to analyze potential problems. Below are five symptoms that relate to noise.
SYMPTOMS AND REMEDIES
TAPERED PADS
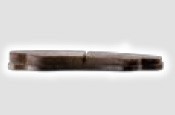
APPEARANCE: Uneven wear, tapered pads
CAUSE: Distorted caliper, caliper slides sticking, excessive caliper clearance
EFFECT: Premature pad wear, uneven braking pressure, noise
REMEDY: Replace pad set, maintain & service caliper
UNEVEN WEAR
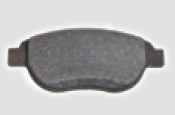
APPEARANCE: Uneven wear on pad surface
CAUSE: Irregularly worn rotor (a wear lip will be visible on the disc)
EFFECT: Squeal & judder, premature pad wear
REMEDY: Replace rotors and pads
UNEVEN WEAR WITHIN AXLE
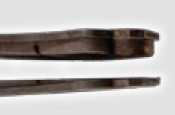
APPEARANCE: One or more brake pad within the axle set will be excessively worn
CAUSE: Caliper guide pins or piston sticking
EFFECT: The vehicle pulls to one side while braking, uneven & rapid pad wear, squeal & judder
REMEDY: Maintain all caliper slides & pistons, replace pads. Check rotors
DAMAGED BACK PLATE
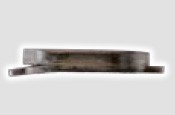
APPEARANCE: Damaged back plate
CAUSE: Incorrect assembly, excessive force used during fitting
EFFECT: Braking inefficiency, irregular wear, noise & judder
REMEDY: Replace full brake pad set
PISTON DAMAGE
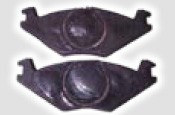
APPEARANCE: Anti-noise features (rubber-coat / shim) damaged by piston
CAUSE: Piston not retracting fully, heavy brake use
EFFECT: Overheating, noise
REMEDY: Replace brake pad set, maintain caliper
C. AVOIDING NOISE PROBLEMS
The easiest way to avoid problems is to ensure that the brake pads and caliper are correctly assembled.
Tips for correct assembly:
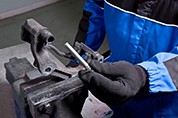
- Strip and clean all the caliper slides and pins
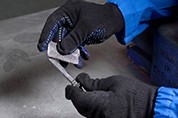
- Emery paper can only be used on the caliper and pad abutments in the case of heavy rust or pollutants
Note: If the caliper is not sliding easily, this can result in tapered pads or uneven wear within the axle, which creates squeal and judder.
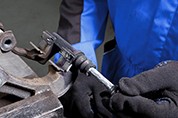
- The pins must have the correct lubrication to ensure free movement so that the pin does not seize into the caliper body. Also, check the condition of the slide pin rubber boots to stop water ingress
Note: If the pins are not lubricated they may seize, causing wear taper and noise issues.
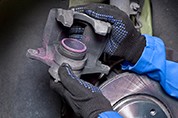
- Check for free piston movement, and retract the piston fully – this is essential to avoid damage to the shim or the rubber coat
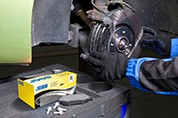
- Check that the brake pads fit freely and easily into the caliper brackets
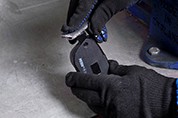
- Clear burrs off the brake pad edges if required
Note: If the pad is not moving freely inside the brackets, there will be ongoing contact with the rotors, causing squealing as well as tapered pads or uneven wear within the axle.
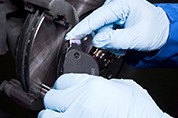
- In certain cases (e.g. an old rusted caliper), it is a good idea to lightly lubricate the contact points between metal back plate and slides with copper grease, according to the vehicle manufacturer’s instructions
Note: Take care that NO grease touches the friction material.
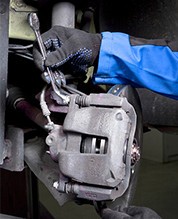
- Insert wear indicators, when appropriate, in or on the brake pads
- Screw in the caliper fixing-bolts
- Replace the thread-lock bolts with new ones
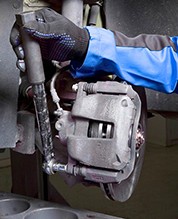
- Follow the correct tightening torque and sequence recommendations
- With the brake caliper reassembled, pump the brake pedal until the stroke is around one third of the full stroke potential
- Check that the brake operates correctly, including pad retraction
- Refit road wheel. If there is free rotation, the vehicle is ready to go back on the road
Note: Do a road test before returning the vehicle to make sure that the brake system is in full working order. When you return the car to the driver, advise them on the correct bedding-in procedure to ensure proper brake efficiency.


 English