Optimizing brake disc performance
Understanding brake disc basics can help you avoid problems and achieve the system performance and longevity you expect.
The heart of your braking system
The key to achieving outstanding brake system performance is to understand the interface between the brake pads and discs. At their most fundamental level, brake systems convert kinetic energy into thermal energy. This occurs as the brake pad friction material contacts the surface of the disc. When this interface is not optimized, a variety of unwanted issues can arise.
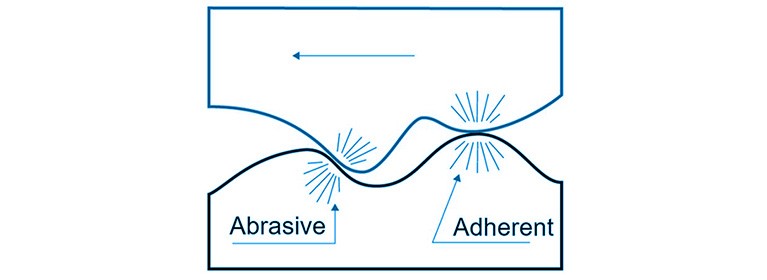
1. Overheating of brake discs
All the heat generated by the braking process needs to go somewhere. When this heat is not adequately dissipated, the brake discs can overheat, leading to a variety of unwanted symptoms, including vibration caused by disc run-out. Run-out can occur when the cast iron structure of a disc exceeds its upper temperature limit (around 650°C). Overheating can be caused by poor driving practices such as repeated sudden braking from high speeds without allowing the discs to cool. Consider that the amount of thermal energy produced during a single braking instance from 90 km/h could boil two litres of water in just three seconds.
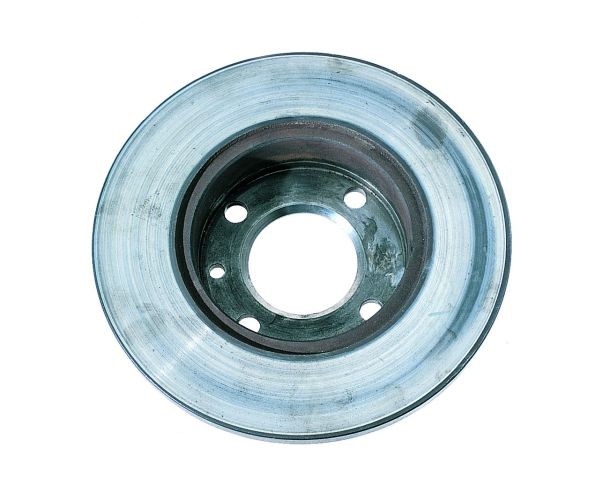
An overheated brake disc
Improper bedding-in, or burnishing, of new brake pads can also lead to overheating by causing excessive friction.
It is important to note that as brake temperatures become extreme, overall braking efficiency decreases. And as temperatures approach the upper threshold of 650°C, a series of metallurgical changes occurs. The disc surface changes its crystalline structure and the outer layers of cast iron transform into a much harder phase known as cementite. Concurrently, the inner layers retain a softer structure.
This phenomenon leads to an "ice crust" effect where the lower coefficient of friction of the hard cementite will cause slipping of the friction block against the disc in some areas, generating an uneven braking feel for the driver.
These metallurgical changes are apparent when viewed under a microscope. The cementite crystals appear as ulcers on the surface of a brake disc that has experienced overheating.
Warning signs: blue spots
Among the earliest and most common visual signs of local overheating are blue spots on the surface of the brake disc. Also, as the overheating intensifies and the crystalline structure of cementite expands, disc geometry can begin to change, resulting in run-out and corresponding vibration.
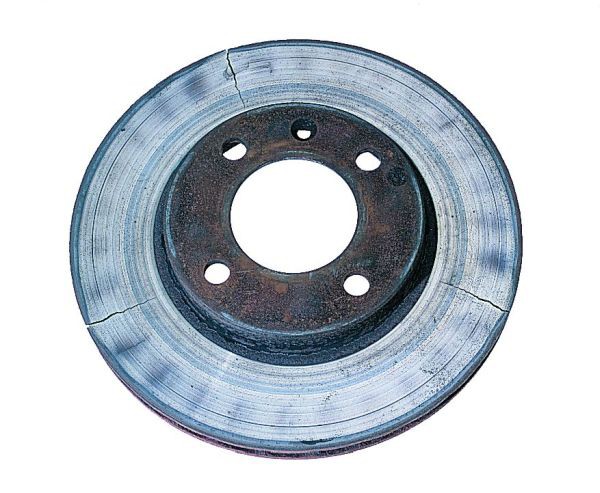
Cracks on the brake disc operating surface
This process can also cause cracking on the disc surface. As cracks grow longer they also become deeper, further impacting disc geometry and the likelihood of run-out. Any cracks longer than 30mm might require a replacement of the disc. Another indication of overheating is the presence of white crumbling edges on the brake pad friction material.
Solution
Proper bedding-in of the brakes is the best way to avoid these and other brake system issues. Focus on braking moderately during the initial 300km of service. Heavy braking should be avoided if possible during this period, as the discs will be more susceptible to overheating.
Another common cause of overheating is a stuck caliper. Make sure caliper guides are free of contamination so they can open properly.
2. Discs are worn out
Sometimes cracking and overheating are caused by the discs having reached the end of their service lives.
Monitor disc thickness
When a disc has reached its minimum operating thickness, it must be replaced. Do not try to extend the life of a worn-out disc simply by installing new brake pads. This is an unsafe practice.
A manufacturer's recommended minimum disc thickness is based on extensive research into the physics of braking. If the disc is too thin, it cannot properly dissipate heat and is likely to lose strength, leading to potentially dangerous overheating and, in extreme cases, catastrophic failure. Additionally, worn-out discs are more likely to generate brake noise.
Bottom line: If disc thickness is even close to the manufacturer's minimum specification, it must be replaced when installing new pads.
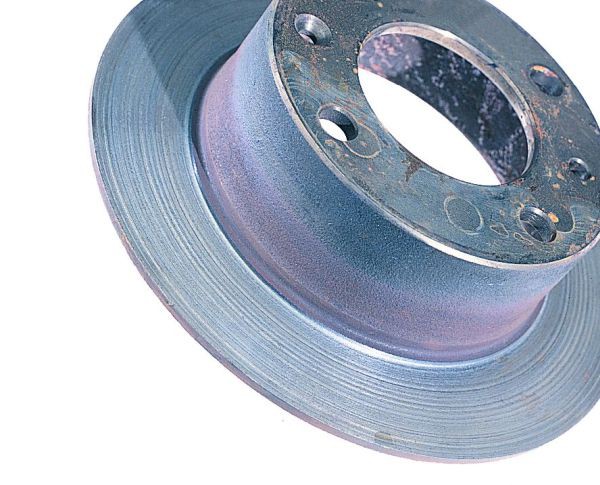
Brake Disc heavily worn with surface grooves
3. Dirty surfaces
An often overlooked cause of braking issues is the presence of even small amounts of sand, grit and other contaminants on the hub surface and/or inner surface of the brake disc. Just a few grains of sand on the hub can cause noticeable run-out, so make sure all working surfaces are pristine.
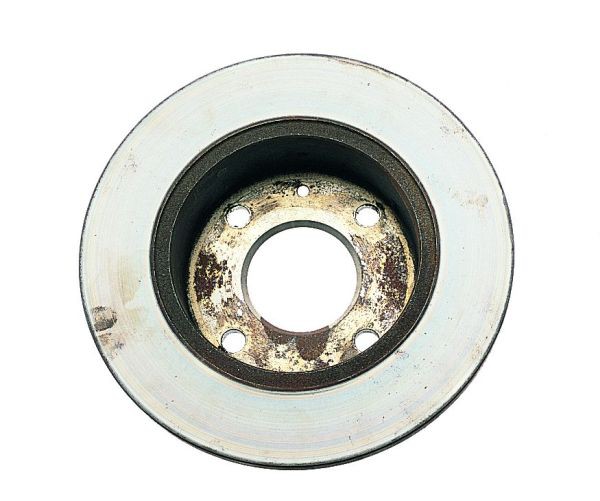
Disc surface contamination
Solution: keep it clean
Every wheel-end surface features precise geometries that must be maintained throughout the life of the vehicle. Even a small grain of foreign material could cause vibration that can be felt at the steering wheel. Carefully clean all surfaces - and then clean them again to protect your work.
4. Disc thickness variation (DTV)
When the thickness of a brake disc varies excessively from one point to another, the disc must be replaced, no matter how "new" it might be. Disc thickness variation (DTV) is typically caused by uneven transfer of the pad friction material to the disc surface. This often occurs when new pads are not properly bedded-in. DTV can also be caused by misalignment of the disc during installation.
Properly identifying DTV requires the use of a micrometer to capture thickness measurements at eight points around the disc circumference - with an interval of 45 degrees from each point - covering the outside, middle and inside regions of the disc.
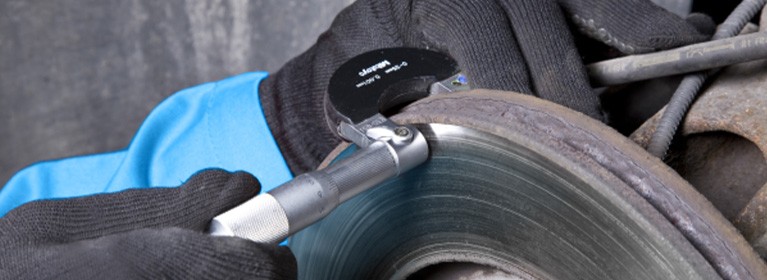
Measure the disc with a micrometer in 8 zones
To determine DTV, select the minimum and maximum thickness values derived from the eight measured points. If the spread between these values is 0.025-0.035mm, for example, use this range to measure the thickness of the new disc at three points and compare to the manufacturer's specifications.
Watch this video to learn how to measure disc thickness.
5. Disc was installed incorrectly
Once again, the geometry of all wheel-end surfaces is critical. If, for example, a brake disc was not flatly seated against the hub, the resulting contamination of the seating surface and/or deformation of the disc's inner face will likely cause unwanted run-out. Excessive wheel bearing play and/or caliper misalignment can also trigger run-out.
Failure to follow the manufacturer's recommended tightening torque and sequence for wheel bolts or nuts can distort the disc's contact surface with the hub. Other installation-related causes of distortion are mechanical stress from displacement, and improper assembly/installation of the caliper and disc. The consequences of each can be serious, including noise, vibration and, in extreme cases, mechanical failure.
Solution
Always install the disc with a torque wrench using a crisscross pattern for the fasteners and following the manufacturer’s torque requirements. Also be sure to verify the correct assembly and installation of the caliper housing before installing the disc.
6. Always use quality discs
Always choose a brand of brakes you know and trust. Remember, many important quality characteristics are invisible to the naked eye. You cannot, for example, assess a disc's metallurgical values without a microscope and extensive training.
Solution
Use what you know and trust. Avoid brands and parts with which you have little or no experience. Every Jurid brake disc and pad is engineered to provide the same or better performance and reliability as the parts originally installed on the vehicle.
In summary
- Measure disc thickness and if below or near minimum specification, replace immediately.
- Only use brake components from a source you trust.
- Rely on a qualified technician who can ensure proper installation.
- Ask your technician to also service the brake calipers when installing new discs and pads.
- Carefully follow recommended bedding-in process for new pads and discs.
For more info on brake disc failures, please check the brake disc trouble tracer:
The content contained in this article is for entertainment, informational and promotional purposes only and should not be used in lieu of seeking professional advice from a certified technician or mechanic. We encourage you to consult with a certified technician or mechanic if you have specific questions or concerns relating to any of the topics covered herein. Under no circumstances will we be liable for any loss or damage caused by your reliance on any content.